

You may take a screenshot of anything on your screen and save it to your clipboard using the Print Screen key on the keyboard of most Dell laptops. Nevertheless, taking a screenshot differs greatly between Dell models. The method you use to take a screen capture may also vary depending on the version of Windows you are running.
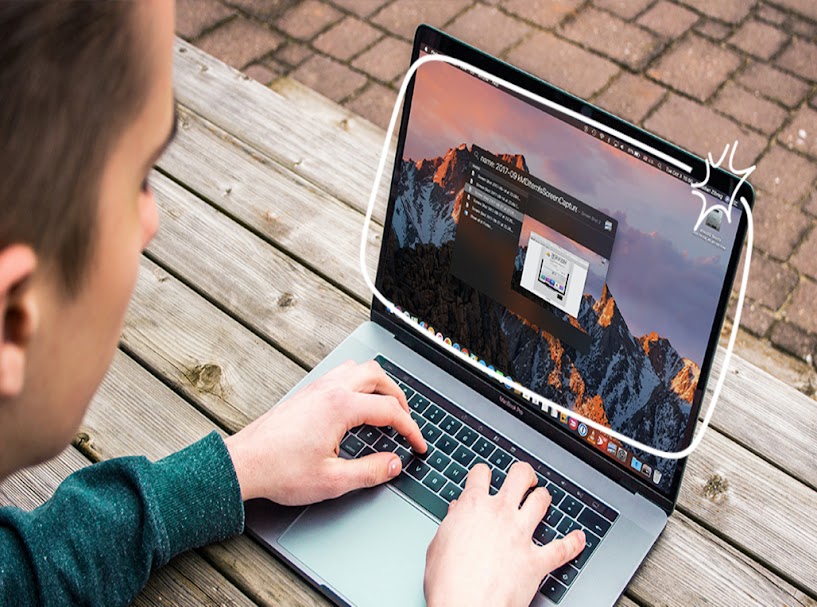
Knowing when and how to record on-screen activity or snap screenshots is becoming more crucial. This is particularly helpful for people who work from home. You’ve come to the ideal place if you need to learn how to screenshot on a Dell laptop for either personal or commercial purposes!
Table of Contents
What exactly is Screenshot?
A screenshot, sometimes known as a screen capture, is an image captured with a computer, smartphone, or tablet to document the visible elements on the screen. The image is saved as a graphics file. You may snap screenshots with various apps or use specific keyboard shortcuts or buttons.
How To Take A Screenshot On A Dell Laptop
Taking a screenshot with your Dell device is simple and can be done in various ways. All of the laptop models and series that follow can be used with the following techniques. This guide explains how to take a screenshot on a Dell laptop.
- The Print Screen Combinations (Prt Sc)
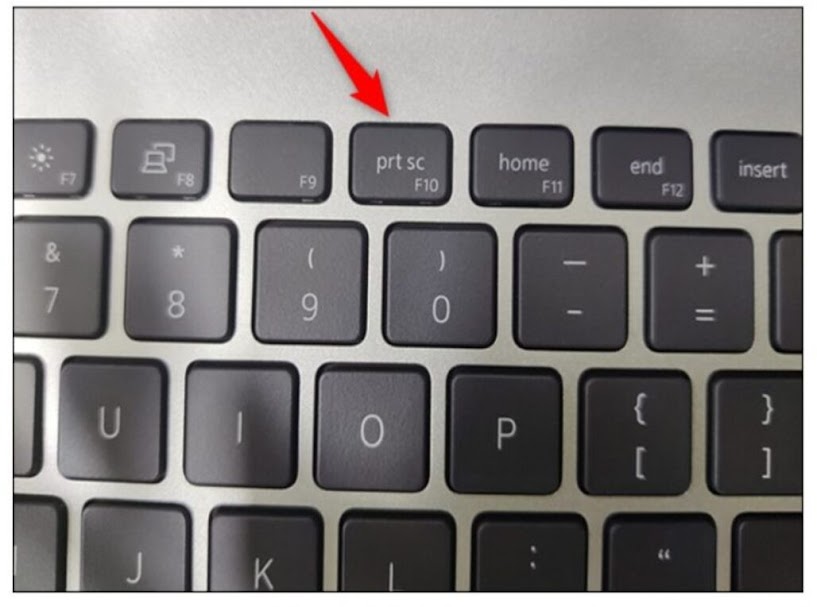
This key is located along the top row of keys and is commonly labelled by Dell as “PrtScn” or “prt sc” (although the precise label may differ depending on the model). On most Dell laptops, you can find the Print Screen key next to the Delete key.
Step 1: As soon as you hit the Print Screen key, a screenshot of your whole screen will be copied to your computer’s clipboard. Once it’s there, you can save it by pasting it into another application, such as Paint.
Step 2: To take a screenshot of just one open window, select the window you want to take a picture of and press the corresponding button. You need to hit ALT + Prt Sc following the screenshot immediately.
The screenshot you took on your Dell device will be transferred to the Clipboard. You can then paste it into any program for graphic editing and save it.
- Taking a screenshot on a Dell laptop with the Snipping Tool

You can also use the Snipping Tool if you want to take a different approach. With the help of this built-in Windows feature, you can take various shaped screenshots. Go to the Start Menu, select Snipping Tool, or enter “Snipping Tool” in the search bar. There will be a plethora of options available when the application opens.
Either choose “New” or hit “Ctrl + N.” Select the shape you wish to use to take a screenshot. The default setting is the rectangular snip. There are three more forms:
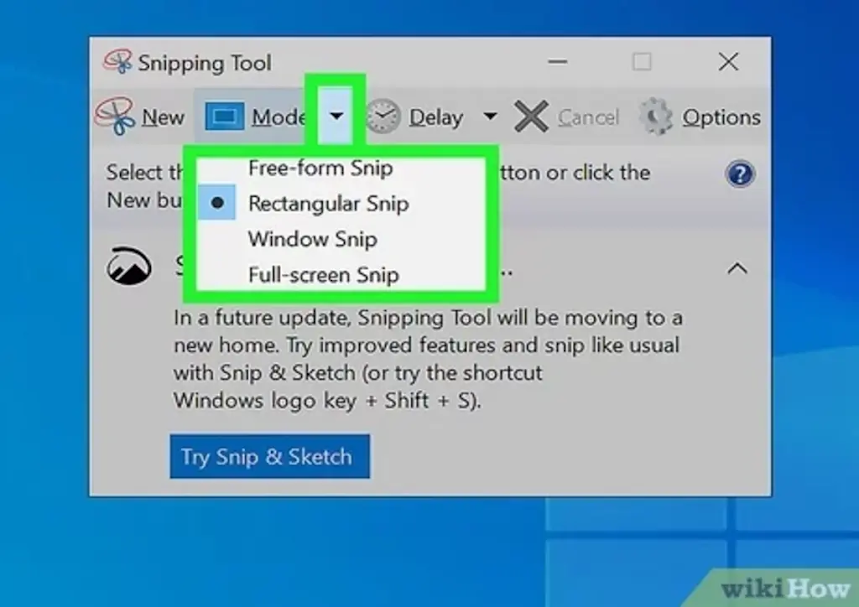
- Full-Screen Snip:
The Full-screen Snip takes a single snapshot of the whole screen. This feature is very helpful if you use numerous tabs open.
- Free Form Snip:
This tool makes it easier to take screenshots of your screen in any format you choose.
- Rectangular Snip:
Allows you to snap a screenshot of a rectangular selection.
- The Window Snip:
You can quickly snap a picture of the open windows using the Window Snip.
After taking your picture, store it in the location of your choice by pressing the keyboard shortcut “Ctrl + S.”
Things to Be Aware Of For Dell Laptop Users
- Different keyboard shortcuts are available based on your model, Windows version, and desired screenshot type.
- The Print Screen key is situated at the apex of the keyboard on the right side of the majority of Dell computers. Occasionally, it’s a function key.
- Any Dell computer has an integrated Windows Snipping Tool that allows you to take screenshots of the screen.
Conclusion
Taking a screenshot is frequently the easiest way to quickly capture something on your computer. Every computer user should be able to rapidly capture their screen for use in tech support information or for sharing on social networking.
Above,, we have shared some of the quickest and most straightforward methods how to take a screenshot on a Dell laptop so that you will never be behind in any situation.
Frequently Asked Questions
Q1. How to do a partial screenshot on a Dell laptop?
Ans. You only need to double-click the “Ctrl” key or click the left button to take a portion of the screenshot, then drag your mouse to choose the desired region of your screen. You can use the keyboard shortcut “Alt” twice on your keyboard, or click the right button to snap a full screenshot.
Q2. Where does a screenshot on a Dell go?
Ans. After being taken, the screenshot is swiftly copied to the laptop’s clipboard. It can then be pasted into an email, file, document, or image editor (like Paint).
Q3. How do I take a screenshot without a Print Screen?
Ans. In case your device lacks the PrtScn button, you can capture a screenshot by pressing the Fn + Windows logo key + Space Bar, which can subsequently be printed.